但是 PGSQL 本身並沒有提供這種功能,只有一兩個稍嫌老舊的外掛雛型(應該還是能用)。。。有一個 Postgres 的延伸專案 Greenplum 由於是資料倉儲軟體,因此內建有 diskquota 外掛,不過 PGSQL 社群看起來不是很感興趣~
因此這邊透過 OS 內建功能達成:利用 Linux 底下 XFS 檔案系統才有的 Project Quota 功能,演練帳號空間控制~
PGSQL 有兩類型的 tablespace:
- 普通用來放資料的,由 default_tablespace 指定
- 暫存表跟查詢過程 temp file,由 temp_tablespace 指定
一般使用上,沒有需要特別指定 tablespace,資料跟暫存表都會放到 $PGDATA/base/ 跟 $PGDATA/base/pgsql_tmp/ 底下。
原則上這邊要限制的是 default_tablespace,至於 temp_tablespace 會涉及查詢成敗,因此要不是額外用較高速的共通磁碟空間,搭配 temp_file_limit 控制。
於是,這篇筆記目標就是使用 xfs_quota 的 Project Quota 功能控制個別 DB 帳號的個人使用空間(defaut_tablespace)。
1) 前置作業:準備測試環境
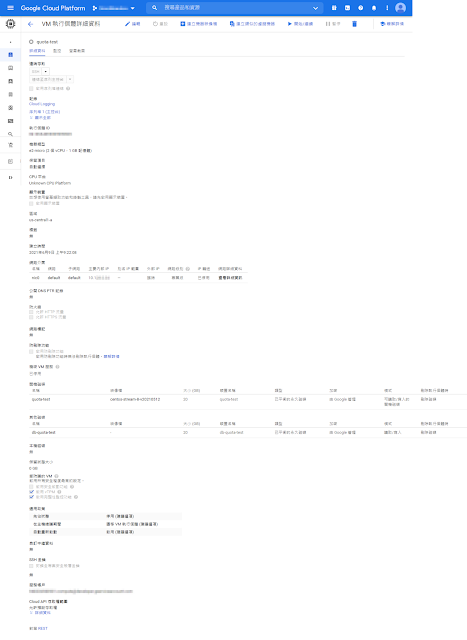
由於測試需要完整的作業系統,因此在久違的 Google 雲端開一個測試環境:
這邊選一個新鮮一點的 CentOS 8 Stream~其實不過是 RHEL 先行版而已,就當成 Ubuntu 非 LTS 發行版就好,其實是完全可用的東西~而硬碟則多分配一個獨立的給資料庫使用,以下的 XFS Project Quota 會在這個掛載點上管控:注意這邊不要偷懶只有使用根目錄掛載點,因為根目錄掛載點(root partition)就算是用 XFS 檔案系統,要啟用 xfs_quota 也額外要設定開機選項(boot parameter),不會偷懶到那去~(參考資料:issues on setting Quota on root filesystem - CentOS Forum)
OS 版本確認
[raven@quota-test ~]$ cat /etc/*release
CentOS Stream release 8
NAME="CentOS Stream"
VERSION="8"
ID="centos"
ID_LIKE="rhel fedora"
VERSION_ID="8"
PLATFORM_ID="platform:el8"
PRETTY_NAME="CentOS Stream 8"
ANSI_COLOR="0;31"
CPE_NAME="cpe:/o:centos:centos:8"
HOME_URL="https://centos.org/"
BUG_REPORT_URL="https://bugzilla.redhat.com/"
REDHAT_SUPPORT_PRODUCT="Red Hat Enterprise Linux 8"
REDHAT_SUPPORT_PRODUCT_VERSION="CentOS Stream"
CentOS Stream release 8
CentOS Stream release 8
[raven@quota-test ~]$
檢查 XFS Quota 套件是否有在
[raven@quota-test ~]$ yum provides xfs_quota
CentOS Stream 8 - AppStream                                    14 MB/s | 9.6 MB     00:00
CentOS Stream 8 - BaseOS                                      7.7 MB/s | 5.7 MB     00:00
CentOS Stream 8 - Extras                                       28 kB/s |  13 kB     00:00
Google Compute Engine                                          15 kB/s | 9.3 kB     00:00
Google Cloud SDK                                               20 MB/s |  32 MB     00:01
xfsprogs-5.0.0-8.el8.i686 : Utilities for managing the XFS filesystem
Repo        : baseos
Matched from:
Filename    : /usr/sbin/xfs_quota

xfsprogs-5.0.0-8.el8.x86_64 : Utilities for managing the XFS filesystem
Repo        : @System
Matched from:
Filename    : /usr/sbin/xfs_quota

xfsprogs-5.0.0-8.el8.x86_64 : Utilities for managing the XFS filesystem
Repo        : baseos
Matched from:
Filename    : /usr/sbin/xfs_quota

[raven@quota-test ~]$
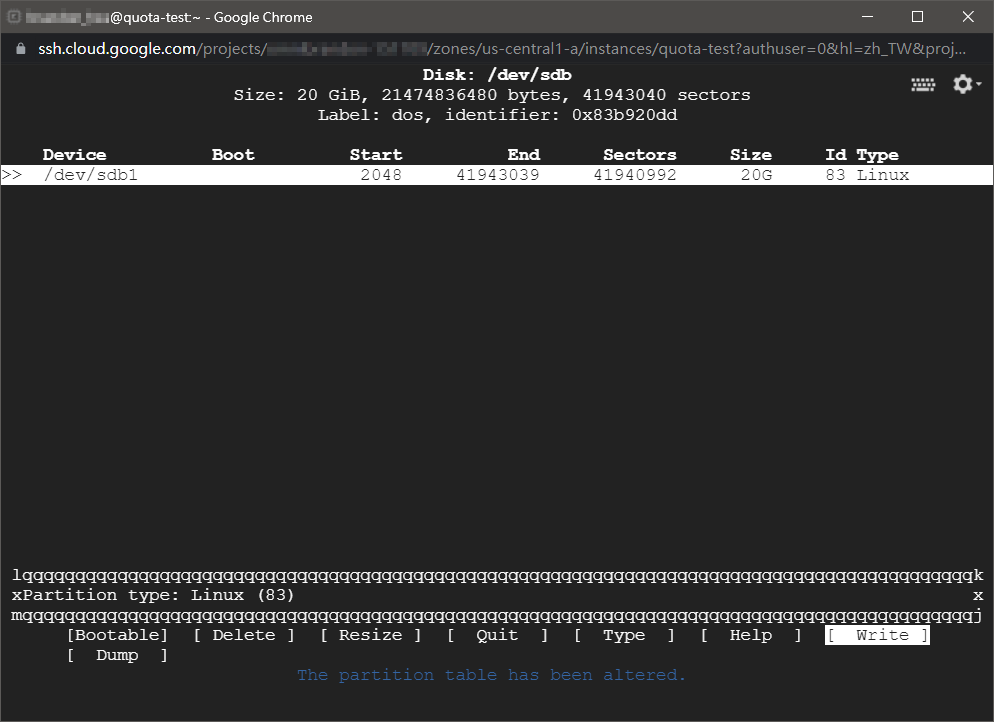
由於 Google 雲端額外掛載的空間不會格式化,因此接著處理格式化跟掛載
格式化的部份,依序要設置磁碟分割表(用 cfdisk 或 cgdisk)以及格式化磁碟(用 mkfs.xfs)
[raven@quota-test ~]$ lsblk -f
NAME   FSTYPE LABEL UUID                                 MOUNTPOINT
sda
├─sda1 vfat         0301-71A4                            /boot/efi
└─sda2 xfs    root  4f04340d-00c4-4006-8c5d-39a3b9cdc445 /
sdb
[raven@quota-test ~]$
[raven@quota-test ~]$ sudo cfdisk /dev/sdb

Syncing disks.
[raven@quota-test ~]$


查看一下,然後格式化
[raven@quota-test ~]$ lsblk -f
NAME   FSTYPE LABEL UUID                                 MOUNTPOINT
sda
├─sda1 vfat         0301-71A4                            /boot/efi
└─sda2 xfs    root  4f04340d-00c4-4006-8c5d-39a3b9cdc445 /
sdb
└─sdb1
[raven@quota-test ~]$
[raven@quota-test ~]$ sudo blkid /dev/sdb1
/dev/sdb1: PARTUUID="83b920dd-01"
[raven@quota-test ~]$ sudo blkid /dev/sdb
/dev/sdb: PTUUID="83b920dd" PTTYPE="dos"
[raven@quota-test ~]$
[raven@quota-test ~]$ sudo mkfs.xfs /dev/sdb1
meta-data=/dev/sdb1              isize=512    agcount=4, agsize=1310656 blks
         =                       sectsz=4096  attr=2, projid32bit=1
         =                       crc=1        finobt=1, sparse=1, rmapbt=0
         =                       reflink=1
data     =                       bsize=4096   blocks=5242624, imaxpct=25
         =                       sunit=0      swidth=0 blks
naming   =version 2              bsize=4096   ascii-ci=0, ftype=1
log      =internal log           bsize=4096   blocks=2560, version=2
         =                       sectsz=4096  sunit=1 blks, lazy-count=1
realtime =none                   extsz=4096   blocks=0, rtextents=0
Discarding blocks...Done.
[raven@quota-test ~]$ sudo blkid /dev/sdb1
/dev/sdb1: UUID="e157f26e-bc4b-404f-893c-f35835a77376" BLOCK_SIZE="4096" TYPE="xfs" PARTUUID="83b920dd-01"
[raven@quota-test ~]$
[raven@quota-test ~]$ lsblk -f
NAME   FSTYPE LABEL UUID                                 MOUNTPOINT
sda
├─sda1 vfat         0301-71A4                            /boot/efi
└─sda2 xfs    root  4f04340d-00c4-4006-8c5d-39a3b9cdc445 /
sdb
└─sdb1 xfs          e157f26e-bc4b-404f-893c-f35835a77376
[raven@quota-test ~]$
1) 掛載並啟用 XFS Quota 功能
首先要先在 /etc/fstab 編輯,設定掛載目錄的同時加上 XFS quota 功能。以下為參考內容,主要是增加紅字部份,並確保掛載格式 xfs
#
# /etc/fstab
# Created by anaconda on Tue May 11 20:59:31 2021
#
# Accessible filesystems, by reference, are maintained under '/dev/disk/'.
# See man pages fstab(5), findfs(8), mount(8) and/or blkid(8) for more info.
#
# After editing this file, run 'systemctl daemon-reload' to update systemd
# units generated from this file.
#
UUID=4f04340d-00c4-4006-8c5d-39a3b9cdc445 /                       xfs     defaults        0 0
UUID=0301-71A4          /boot/efi               vfat    defaults,uid=0,gid=0,umask=077,shortname=winnt 0 2
UUID="e157f26e-bc4b-404f-893c-f35835a77376" /pgdata              xfs     defaults,usrquota,prjquota        0 0
[raven@quota-test ~]$ sudo vi /etc/fstab
### 參照以上方式作編輯 ###
[raven@quota-test ~]$ sudo mkdir -p /pgdata
[raven@quota-test ~]$ sudo mount -a
[raven@quota-test ~]$ lsblk -f
NAME   FSTYPE LABEL UUID                                 MOUNTPOINT
sda
├─sda1 vfat         0301-71A4                            /boot/efi
└─sda2 xfs    root  4f04340d-00c4-4006-8c5d-39a3b9cdc445 /
sdb
└─sdb1 xfs          e157f26e-bc4b-404f-893c-f35835a77376 /pgdata
[raven@quota-test ~]$
設定好之後,可以先查詢狀態:如果是之前已經掛載好的空間,如上調整後要重新掛載才行。
[raven@quota-test ~]$ sudo xfs_quota -x -c "print"
Filesystem          Pathname
/                   /dev/sda2
/pgdata             /dev/sdb1 (uquota, pquota)
[raven@quota-test ~]$
[raven@quota-test ~]$ sudo xfs_quota -x -c "df -h" /pgdata
Filesystem     Size   Used  Avail Use% Pathname
/dev/sdb1     20.0G   218M  19.8G   1% /pgdata
[raven@quota-test ~]$
接下來的動作需要有資料庫的作業系統帳號,因此以下先打斷安裝 PGSSQL 資料庫。
1’) 初始化一個 PGSQL13:使用 YUM 指令的下一代 DNF 操作,具體指令在 PGSQL YUM Repo 都有~
[raven@quota-test ~]$ sudo dnf install -y https://download.postgresql.org/pub/repos/yum/reporpms/EL-8-x86_64/pgdg-redhat-repo-latest.noarch.rpm
[raven@quota-test ~]$ sudo dnf -qy module disable postgresql
Importing GPG key 0x442DF0F8:
 Userid     : "PostgreSQL RPM Building Project <pgsql-pkg-yum@postgresql.org>"
 Fingerprint: 68C9 E2B9 1A37 D136 FE74 D176 1F16 D2E1 442D F0F8
 From       : /etc/pki/rpm-gpg/RPM-GPG-KEY-PGDG
Importing GPG key 0x442DF0F8:
 Userid     : "PostgreSQL RPM Building Project <pgsql-pkg-yum@postgresql.org>"
 Fingerprint: 68C9 E2B9 1A37 D136 FE74 D176 1F16 D2E1 442D F0F8
 From       : /etc/pki/rpm-gpg/RPM-GPG-KEY-PGDG
Importing GPG key 0x442DF0F8:
 Userid     : "PostgreSQL RPM Building Project <pgsql-pkg-yum@postgresql.org>"
 Fingerprint: 68C9 E2B9 1A37 D136 FE74 D176 1F16 D2E1 442D F0F8
 From       : /etc/pki/rpm-gpg/RPM-GPG-KEY-PGDG
Importing GPG key 0x442DF0F8:
 Userid     : "PostgreSQL RPM Building Project <pgsql-pkg-yum@postgresql.org>"
 Fingerprint: 68C9 E2B9 1A37 D136 FE74 D176 1F16 D2E1 442D F0F8
 From       : /etc/pki/rpm-gpg/RPM-GPG-KEY-PGDG
Importing GPG key 0x442DF0F8:
 Userid     : "PostgreSQL RPM Building Project <pgsql-pkg-yum@postgresql.org>"
 Fingerprint: 68C9 E2B9 1A37 D136 FE74 D176 1F16 D2E1 442D F0F8
 From       : /etc/pki/rpm-gpg/RPM-GPG-KEY-PGDG
Importing GPG key 0x442DF0F8:
 Userid     : "PostgreSQL RPM Building Project <pgsql-pkg-yum@postgresql.org>"
 Fingerprint: 68C9 E2B9 1A37 D136 FE74 D176 1F16 D2E1 442D F0F8
 From       : /etc/pki/rpm-gpg/RPM-GPG-KEY-PGDG
[raven@quota-test ~]$
[raven@quota-test ~]$ sudo dnf install -y postgresql13-server
Last metadata expiration check: 0:00:23 ago on Tue 08 Jun 2021 06:31:27 AM UTC.
Dependencies resolved.
==============================================================================================
 Package                      Architecture    Version                   Repository       Size
==============================================================================================
Installing:
 postgresql13-server          x86_64          13.3-2PGDG.rhel8          pgdg13          5.5 M
Installing dependencies:
 postgresql13                 x86_64          13.3-2PGDG.rhel8          pgdg13          1.5 M
 postgresql13-libs            x86_64          13.3-2PGDG.rhel8          pgdg13          413 k

Transaction Summary
==============================================================================================
Install  3 Packages

Total download size: 7.4 M
Installed size: 31 M
 . . . 略 . . .
[raven@quota-test ~]$ sudo cp /usr/lib/systemd/system/postgresql-13.service /etc/systemd/system
[raven@quota-test ~]$ sudo sed -e 's@/var/lib/pgsql/13/data/@/pgdata/13/data@g' -i /etc/systemd/system/postgresql-13.service
[raven@quota-test ~]$ sudo systemctl daemon-reload
[raven@quota-test ~]$ sudo /usr/pgsql-13/bin/postgresql-13-setup initdb
Initializing database ... OK

[raven@quota-test ~]$
[raven@quota-test ~]$ sudo chown -R postgres. /pgdata/13/
2) 設定 XFS Project Qouta
先準備測試 tablespace 用的目錄,也就是準備受空間用量控制的目錄。
[raven@quota-test ~]$ sudo su - postgres
[postgres@quota-test ~]$ mkdir -p /pgdata/13/tbs1
[postgres@quota-test ~]$ mkdir -p /pgdata/13/tbs2
[postgres@quota-test ~]$ chmod -R 700 /pgdata/13/tbs1/ /pgdata/13/tbs2/
[postgres@quota-test ~]$
再設定個別的 quota project:這邊打算開兩個 tablespace 分別分配給兩個資料庫帳號,並個別指定空間上限。
[raven@quota-test ~]$ sudo xfs_quota -x -c "report -ubih" /pgdata
User quota on /pgdata (/dev/sdb1)
                        Blocks                            Inodes
User ID      Used   Soft   Hard Warn/Grace     Used   Soft   Hard Warn/Grace
---------- --------------------------------- ---------------------------------
root            0      0      0  00 [------]      3      0      0  00 [------]
postgres    42.5M      0      0  00 [------]    965      0      0  00 [------]

[raven@quota-test ~]$
[raven@quota-test ~]$ sudo su -
[root@quota-test ~]# echo "11:/pgdata/13/tbs1" >> /etc/projects
[root@quota-test ~]# echo "12:/pgdata/13/tbs2" >> /etc/projects
[root@quota-test ~]# echo "dbuser1:11" >> /etc/projid
[root@quota-test ~]# echo "dbuser2:12" >> /etc/projid
[root@quota-test ~]# xfs_quota -x -c "project -s dbuser1"
Setting up project dbuser1 (path /pgdata/13/tbs1)...
Processed 1 (/etc/projects and cmdline) paths for project dbuser1 with recursion depth infinite (-1).
Setting up project dbuser1 (path /pgdata/13/tbs1)...
Processed 1 (/etc/projects and cmdline) paths for project dbuser1 with recursion depth infinite (-1).
[root@quota-test ~]# xfs_quota -x -c "project -s dbuser2"
Setting up project dbuser2 (path /pgdata/13/tbs2)...
Processed 1 (/etc/projects and cmdline) paths for project dbuser2 with recursion depth infinite (-1).
Setting up project dbuser2 (path /pgdata/13/tbs2)...
Processed 1 (/etc/projects and cmdline) paths for project dbuser2 with recursion depth infinite (-1).
[root@quota-test ~]#
[root@quota-test ~]# xfs_quota -x -c "print " /pgdata
Filesystem          Pathname
/pgdata             /dev/sdb1 (uquota, pquota)
/pgdata/13/tbs1     /dev/sdb1 (project 11, dbuser1)
/pgdata/13/tbs2     /dev/sdb1 (project 12, dbuser2)
[root@quota-test ~]#
上面初始化之後,然後就能指定大小限制:分別指定 500MB 跟 1GB
[root@quota-test ~]# xfs_quota -x -c "limit -p bsoft=450M bhard=500M dbuser1" /pgdata
[root@quota-test ~]# xfs_quota -x -c "limit -p bsoft=900M bhard=1G dbuser2" /pgdata
這樣就已經生效了。接著查看一下資訊
[raven@quota-test ~]$ ls -l /pgdata/13/
total 4
drwx------. 20 postgres postgres 4096 Jun  9 03:12 data
drwx------.  2 postgres postgres    6 Jun  9 03:13 tbs1
drwx------.  2 postgres postgres    6 Jun  9 03:13 tbs2
[raven@quota-test ~]$
[raven@quota-test ~]$ sudo xfs_quota -x -c "state"
User quota state on /pgdata (/dev/sdb1)
  Accounting: ON
  Enforcement: ON
  Inode: #131 (1 blocks, 1 extents)
Group quota state on /pgdata (/dev/sdb1)
  Accounting: OFF
  Enforcement: OFF
  Inode: N/A
Project quota state on /pgdata (/dev/sdb1)
  Accounting: ON
  Enforcement: ON
  Inode: #132 (1 blocks, 1 extents)
Blocks grace time: [7 days]
Inodes grace time: [7 days]
Realtime Blocks grace time: [7 days]
[raven@quota-test ~]$
[raven@quota-test ~]$ sudo xfs_quota -x -c "report -ubih" /pgdata
User quota on /pgdata (/dev/sdb1)
                        Blocks                            Inodes
User ID      Used   Soft   Hard Warn/Grace     Used   Soft   Hard Warn/Grace
---------- --------------------------------- ---------------------------------
root            0      0      0  00 [------]      3      0      0  00 [------]
postgres    39.4M      0      0  00 [------]    965      0      0  00 [------]

[raven@quota-test ~]$
[raven@quota-test ~]$ sudo xfs_quota -x -c "report -pbih " /pgdata
Project quota on /pgdata (/dev/sdb1)
                        Blocks                            Inodes
Project ID   Used   Soft   Hard Warn/Grace     Used   Soft   Hard Warn/Grace
---------- --------------------------------- ---------------------------------
#0          39.4M      0      0  00 [------]    966      0      0  00 [------]
dbuser1         0   450M   500M  00 [------]      1      0      0  00 [------]
dbuser2         0   900M     1G  00 [------]      1      0      0  00 [------]

[raven@quota-test ~]$
3) 指定 Tablespace 與帳號的 default_tablespace
把資料庫啟動,並開兩個帳號,以及對應的 tablespace。這邊也同時把預設 tablespace 位置的寫入權拿掉
[raven@quota-test ~]$ sudo service postgresql-13 start
[raven@quota-test ~]$ sudo su - postgres
[postgres@quota-test ~]$ psql << EOF
create user user1;
create user user2;
revoke CREATE on TABLESPACE pg_default from user1;
revoke CREATE on TABLESPACE pg_default from user2;
create tablespace tbs1 owner user1 location '/pgdata/13/tbs1';
create tablespace tbs2 owner user2 location '/pgdata/13/tbs2';
alter user user1 set default_tablespace = tbs1 ;
alter user user2 set default_tablespace = tbs2 ;
create schema sch1 AUTHORIZATION user1 ;
create schema sch2 AUTHORIZATION user2 ;
EOF
[postgres@quota-test ~]$
為了測試方便,把 local connection 的連線規則開通
[postgres@quota-test ~]$ sed -e 's/peer$/trust/g' -i /pgdata/13/data/pg_hba.conf
[postgres@quota-test ~]$ /usr/pgsql-13/bin/pg_ctl -D /pgdata/13/data/ reload
4) 驗證
這邊先在第一個帳號透過 pgbench 指令長檔案:雖然上面給了一個 schema,但 pgbench 預設的資料表長在 public schema 底下。不過指定的預設 tablespace 還是會生效。
長完資料後觀察一下 xfs_quota 用量變化。
[postgres@quota-test ~]$ /usr/pgsql-13/bin/pgbench -U user1 -d postgres --initialize --scale=30  --fillfactor=90
dropping old tables...
NOTICE:  table "pgbench_accounts" does not exist, skipping
NOTICE:  table "pgbench_branches" does not exist, skipping
NOTICE:  table "pgbench_history" does not exist, skipping
NOTICE:  table "pgbench_tellers" does not exist, skipping
creating tables...
generating data (client-side)...
3000000 of 3000000 tuples (100%) done (elapsed 8.06 s, remaining 0.00 s)
vacuuming...
creating primary keys...
done in 104.53 s (drop tables 0.00 s, create tables 0.01 s, client-side generate 8.09 s, vacuum 37.03 s, primary keys 59.37 s).
[postgres@quota-test ~]$
postgres=# \d+
                                List of relations
 Schema |       Name       | Type  | Owner | Persistence |  Size   | Description
--------+------------------+-------+-------+-------------+---------+-------------
 public | pgbench_accounts | table | user1 | permanent   | 426 MB  |
 public | pgbench_branches | table | user1 | permanent   | 40 kB   |
 public | pgbench_history  | table | user1 | permanent   | 0 bytes |
 public | pgbench_tellers  | table | user1 | permanent   | 48 kB   |
(4 rows)

postgres=# \d+ pgbench_accounts
                                  Table "public.pgbench_accounts"
  Column  |     Type      | Collation | Nullable | Default | Storage  | Stats target | Descrip
tion
----------+---------------+-----------+----------+---------+----------+--------------+--------
-----
 aid      | integer       |           | not null |         | plain    |              |
 bid      | integer       |           |          |         | plain    |              |
 abalance | integer       |           |          |         | plain    |              |
 filler   | character(84) |           |          |         | extended |              |
Indexes:
    "pgbench_accounts_pkey" PRIMARY KEY, btree (aid), tablespace "tbs1"
Tablespace: "tbs1"
Access method: heap
Options: fillfactor=90

postgres=#
[raven@quota-test ~]$ sudo xfs_quota -x -c "report -pbih " /pgdata
Project quota on /pgdata (/dev/sdb1)
                        Blocks                            Inodes
Project ID   Used   Soft   Hard Warn/Grace     Used   Soft   Hard Warn/Grace
---------- --------------------------------- ---------------------------------
#0         663.7M      0      0  00 [------]   1.0k      0      0  00 [------]
dbuser1    490.7M   450M   500M  00 [6 days]     27      0      0  00 [------]
dbuser2         0   900M     1G  00 [------]      2      0      0  00 [------]

[raven@quota-test ~]$
上面用 pgbench 佔用了 user1 的 tablespace 快差不多了。以下臨門一腳多塞一點就會出現空間不足訊息,表示 dusk quota 控制生效~
[postgres@quota-test ~]$ psql -U user1 -d postgres
psql (13.3)
Type "help" for help.
postgres=> create table sch1.test as select * from pgbench_accounts limit 100000;
ERROR:  could not extend file "pg_tblspc/16386/PG_13_202007201/13434/16456": No space left on device
HINT:  Check free disk space.
postgres=>
postgres=> create table sch1.test as select * from pgbench_accounts limit 10000;
SELECT 10000
postgres=>
postgres=> set search_path = sch1;
SET
postgres=> \d+
                          List of relations
 Schema | Name | Type  | Owner | Persistence |  Size   | Description
--------+------+-------+-------+-------------+---------+-------------
 sch1   | test | table | user1 | permanent   | 1312 kB |
(1 row)

postgres=>
換另一個帳號,這邊直接嘗試長超過空間的資料量。
[postgres@quota-test ~]$ /usr/pgsql-13/bin/pgbench -U user2 -d postgres --initialize --scale=100
dropping old tables...
NOTICE:  table "pgbench_accounts" does not exist, skipping
NOTICE:  table "pgbench_branches" does not exist, skipping
NOTICE:  table "pgbench_history" does not exist, skipping
NOTICE:  table "pgbench_tellers" does not exist, skipping
creating tables...
generating data (client-side)...
10000000 of 10000000 tuples (100%) done (elapsed 70.18 s, remaining 0.00 s)
ERROR:  could not extend file "pg_tblspc/16387/PG_13_202007201/13434/16480": No space left on device
HINT:  Check free disk space.
CONTEXT:  COPY pgbench_accounts, line 7995000
pgbench: fatal: PQendcopy failed
[postgres@quota-test ~]$
以上都顯示 disk quota 有成功起作用。而這些因空間不足而失敗的操作,原則上都是 rollback。
5) quota 的控制與資料庫啟停
以下停用 tbs2 上面的 porject quota 再嘗試塞一次
[raven@quota-test ~]$ sudo xfs_quota -x -c 'limit -p bsoft=0 bhard=0 dbuser2' /pgdata
[raven@quota-test ~]$ sudo xfs_quota -x -c "report -pbih " /pgdata
Project quota on /pgdata (/dev/sdb1)
                        Blocks                            Inodes
Project ID   Used   Soft   Hard Warn/Grace     Used   Soft   Hard Warn/Grace
---------- --------------------------------- ---------------------------------
#0         855.7M      0      0  00 [------]   1.0k      0      0  00 [------]
dbuser1         0   450M   500M  00 [------]      3      0      0  00 [------]
dbuser2         0      0      0  00 [------]     11      0      0  00 [------]

[raven@quota-test ~]$
[postgres@quota-test ~]$ /usr/pgsql-13/bin/pgbench -U user2 -d postgres --initialize --scale=100
dropping old tables...
creating tables...
generating data (client-side)...
10000000 of 10000000 tuples (100%) done (elapsed 96.82 s, remaining 0.00 s)
vacuuming...
creating primary keys...
done in 479.96 s (drop tables 0.00 s, create tables 0.01 s, client-side generate 97.37 s, vacuum 242.73 s, primary keys 139.84 s).
[postgres@quota-test ~]$ psql
psql (13.3)
Type "help" for help.

postgres=# \d+
                                List of relations
 Schema |       Name       | Type  | Owner | Persistence |  Size   | Description
--------+------------------+-------+-------+-------------+---------+-------------
 public | pgbench_accounts | table | user2 | permanent   | 1281 MB |
 public | pgbench_branches | table | user2 | permanent   | 40 kB   |
 public | pgbench_history  | table | user2 | permanent   | 0 bytes |
 public | pgbench_tellers  | table | user2 | permanent   | 80 kB   |
(4 rows)

postgres=#
可以看到拿掉限制後,一樣多的資料就塞的進去了。
由上可見,透過 xfs_quota 的目錄用量控制功能,可以 DIY 做出資料庫帳號的空間用量控制功能~
參考資料
14.1.6 實作 Quota 流程-4:project 的限制 (針對目錄限制) (Optional) | 鳥哥私房菜- 第十四章、磁碟配額(Quota)與進階檔案系統管理
Linux: Using xfs project quotas to limit capacity within a subdirectory – Fabian Lee : Software Architect
3.3. XFS Quota Management Red Hat Enterprise Linux 7
8.3. XFS Quota Management Red Hat Enterprise Linux 6
All About Tablespaces in PostgreSQL - pgDash
disk space utilization - how to remove a project id from xfs project quota? - Server Fault
沒有留言:
張貼留言